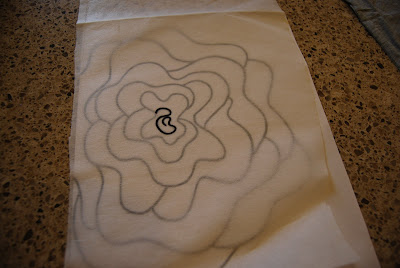
Materials:
Shirt
Value pack of glass seed beads
Fusible Interfacing
Thread
Needle
Pattern

1. Download my pattern
Beaded Flower Shirt - and trace it onto the smooth side of the FUSIBLE INTERFACING. **I only had regular interface, so I had to pin my pattern on. It was a pain. Save yourself a lot of trouble and buy the fusible kind.**


2. Cut out the pattern, leaving about 1" of space around.

3. Iron on your interfacing to the INSIDE of your shirt, making sure that it doesn't wrinkle underneath the pattern. **If you don't have the fusible kind, pin the heck out of it so it doesn't move.**

*Click here for a step-by-step tutorial on how to create the string of beads, as my explanation is crummy.
4. **I'm sorry I don't have a picture of this. I figured it out through trial and error and forgot to take pictures** Thread your needle (1 long piece folded over so it is "double") and string 3-5 beads. Take the needle, and push it back through the 2nd bead closest to it (there will be a loop around the first bead), then 2 more beads. **think of it as an "i", where the dot is the bead closest to the needle (you DON'T go through it), and the straight part has 2 lengths of string through it because you went through it again with the needle.** At this point, you will double knot your string so your 5 beads are completely secure and won't fall off. Now, load up your string with beads. I found that it was better to try and measure how long each section was, then make a bead length equal to that. When you have the right amount of beads, you do the confusing loopy thing again with the needle. To tie the knot, you will take your string (once it has been pushed through 5 or so beads), loop it around the beaded string, and pull tight. Do this twice.

5. Working from the INSIDE of the shirt, you will carefully whip stitch the beaded string to the FRONT of the shirt. You want to remember to keep the stitches small. This will be easiest if you stitch between the beads, instead of on top of them. Making any sense at all?


6. You are done! Hooray for you!


4 comments:
Okay, I love it but I have to admit, I am a little confused. I was a LOT confused and then I read it again and thought about it and now I think I get the whip-stitching the string of beads to the shirt. I think I even get how to string the first few beads on (the i thing makes sense), but I guess I won't really know until I try it. :) Such a great and cute idea!
I love it, so cute, fun and easy!
A little confused too. Are you sewing the beads down as you go, or loading up on the string with beads and then tacking them down to the front every so often (ie couching in embroidery terms)? I totally love the look! About how long did it take? Thanks!!
Sharon and Lorene,
I knew it was confusing when I wrote it, but I couldn't figure out how to say it better. My bad. I am posting a detailed mini tutorial on how to bead it. Sharon, I'm not familiar with the embroidery term, but it sounds just like what I did. :) Hopefully the mini tute will clear up the confusion! Also, the shirt took me about 6 hours, but I had to (re)create a pattern, figure out how to get the beads to stay on the shirt, and take pictures. I estimate that it should take about 2-2 1/2 hours to make.
Post a Comment